AV-Racer Devlog (1): Getting a functional car model
est. reading time: 10 minutes
The first question revolving around the interest of making a car game was figuring out the methods used by
car games in simulating a car body. My modest lacunary conglamurate of car facts was all I had to start
with, the general idea was to simulate car and tire forces that would move the thing through the might of
physics.
The right approach to this problem became a matter of discussion and debate between me and my close friend
Said Al Attrach, we came across a very
interesting website that provided useful information to start our
project with.
I setup a very basic project pipeline, using SDL2 to handle windows, events and rendering (later switching to
my own renderer with OpenGL), made a quick couple of drawings on Aseprite and rendered a car in the center
of the screen, a generic map behind it, and moved the car in a virtual sim space, moving the camera to
follow its position as the car moves Camera.P = Car.P; I set up ImGui in the game to streamline any changes
or input we needed to use, it was and still is a great decision, very useful for debug.
The car had a 2D space position P and velocity V, we used input from the keyboard to add a constant force to
a local acceleration value that we added to the car's velocity through the loops, the velocity adds to the
position. We also had an angular velocity aV that adds to the car's Angle which rotates the sprite.
We didn't have a good understanding of car physics and our attempts at a somewhat realistic simulation
failed, so we resorted to an arcade-like model, which I will describe in the next section.
Settling for a simpler model
I started from scratch. By that time the car already had an RPM system and a dysfunctional traction
calculation, I started by simplifying the car into a single object, not four tires. One tire, or closer to a
rolling ball.
Acceleration
To move the car we need to add some sort of force proportionate to “Gas” input to the total velocity of the
car over time, i.e. acceleration. We need a 2D vector that adds to the 2D vector V to modify it. The
acceleration vector should always point in the direction the car's pointing in, that's the direction the
accelerating force would be applied.
We therefore need the normalized car's longitudinal vector which we can derive from the car's angle (Angle),
we can also get the lateral vector from it which we would need later. Then all we need to do to construct
the acceleration vector is to multiply the vector with a modifier that is dependent on the gas input (Gas),
a float from 0.0 to 1.0 that represents how much the gas was pressed, then multiply all of that with a
coefficient we eyeball through testing to adjust how intensive the throttle input is:
    v2 Lon = v2(cos(Angle)), sin(Angle));
    v2 Lat = v2(-Lon.y, Lon.x);
    v2 Acceleration = Lon * Gas * TorqueCoeff;
Braking
Next we need can construct a vector that represents brake power. When hitting the brakes, the forces acting on
the car causing it to slow down can be represented in a single simple force that acts in the opposite direction
of the car's velocity vector; however way the car is headed, the braking force acts in the opposite direction.
This force would be proportionate to the input of the brake pedal (0.0 to 1.0) and is scaled by a brake
coefficient.
Note how we need to normalize the velocity vector to use it as a direction.
Putting these together the car might oscillate when braking as it overshoots at low speeds. There are two ways
to fix the problem and I implement both: interpolation, and simulating friction forces.
Friction forces are the forces that bring an object to a halt when there's no other forces applied to it, in a
sound and accurate physical simulation this force is relevant in its role in slowing the car down. At high
speeds the air drag resistance plays a larger role at slowing the car down. In our case I use friction forces at
low speeds where they're mostly relevant. Remember the goal here was to make a car that feels good to drive and
not necessarily a simulation.
It is relevant at this point to introduce a nifty little mathematical operation I use it all over the place in
this project. A logarithmic scaler:
It uses a simple exponential equation and a modifier to adjust a curve that always crosses 0 and 1 and therefore
can be used to modify values on a logarithmic scale from 0 to 1. Try it here.
I use the logarithmic scaler with the length of the velocity vector as a modifier to the friction forces to only
be relevant at low speeds, and multiply it with a negative coefficient to act -like braking- in a direction
opposing the car's. We construct the following vector:
The fourth main force relevant to the car is longitudinal resistance, a force that represents air drag,
friction, or other forces that slow the car down at high speeds. This force is proportionate to the car's speed,
the faster the car is, the higher it will be. This force limits the car's indefinite acceleration. We can
therefore multiply it by the velocity vector directly and a negative coefficient.
v2 Resistence = -DragCoeff * Car.V;
All of these coefficients present a tall order of calibration, but they mostly depend on the sim's units, car's
relative dimensions and how one would like to make the car feel, so there isn't really any clear cut “right”
values
for them. Their point is to make the job easier to calibrate the vectors, and offer an easy way to tweak car
performance in gameplay.
Adding all those vectors to one we get the following, which we apply to the velocity vector:
Next we can look into the car's angular velocity and change of its angle. Here I hacked the method. The result I
was looking for was a car that turns with a wider angle the faster it is, but in order to program a proper
angular
velocity I would have to deal with lateral forces that stop the car's rotation. I ended up just clamping the
angular velocity between two limits that grow or shrink based inversely proportional to the car's speed. I
created a
float angular_v_limit and it was calculated from the exponent of the negative
car speed and clamped between 0 and a
value that was calibrated through testing to what looked like a good maximal rotation speed. The result made the
car's
angular velocity effectively less intense the faster the car was.
Then the change to the car's angular velocity would be proportionate to how far the wheels were turned, a
coefficient to easily adjust the values, and then clamped to be within the angular limit defined above.
After some adjustment of the coefficients, the above results in a car that turns well and drives plausibly, but
is
infinitely grippy. Now, while I decided against any complex driving mechanics that can result in a loss of grip
through loss of traction, slip, or car weight related systems, a “fake” sliding of the car as it turns can
result in
a fun looking and feeling car that is easy to drive.
To create a sliding effect, we can make the car face an angle different that it it is heading, this is, in
essence,
what drifting or sliding is. To achieve this, we can deconstruct the velocity vector of the car into a
longitudinal
and lateral components and scale down the lateral component by a certain amount while keeping all the
calculations
above as is. This deconstruction is done to the final car velocity vector after applying the forces and the
resulting effects manifest organically.
To deconstruct the velocity vector we take the dot product of it and the longitudinal or lateral vector
respectively
and multiply by that vector. The dot product is like dropping a shadow of a vector onto another and measuring
the
length of that shadow, and the multiplication of said length with a normalized vector results in a vector
pointing
in that direction that has a length of the dot product.
After we deconstruct the vector we reconstruct it with the lateral vector scaled down using a slide coefficient
between 0.0 and 1.0 we adjust through testing. All of this is applied after VelocityChange is added to the car's
vector.
Substepping is running the simulation in multiple smaller substeps per frame to increase simulation accuracy and
prevent simulations from “blowing up”, which shortly put, is when a simulation runs very large value changes per
step that result in inaccurate handling of the physics running behind. The solution to this is to make the
simulation run smaller steps and this is a simple way to solve this.
The approach is simple, you loop over the same simulation an N number of substeps but also multiply every change
you
apply to the system by 1/N.
So let's say our simulation is a function that takes a float dt that is defined as:
float dt = 1.0f / substeps;
we can achieve accurate results be multiplying relevant changes to the car's angular and longitudinal
velocities, angle and position with dt:
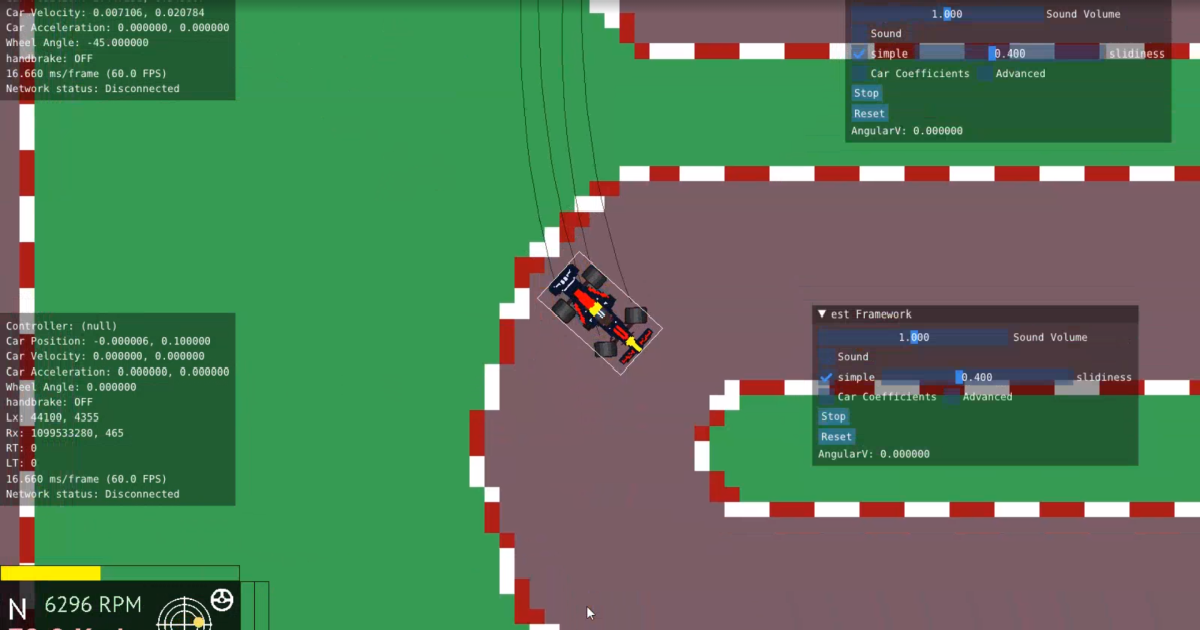
Putting all of this together, and calibrating the coefficients, we get the following result:
This looks better and more consistent doesn't it? The car feels like it slides well but you're always in
control, it fits an arcade racer. This system is used in the game in its current state. The different
coefficients have been
crucial in adjusting gameplay, ImGui's interfaced made those changes easy to apply.
The SlideCoeff later became a changing variable that varied depending on whether the car was on or off track,
which added nuance and more options for varied gameplay. The value could also be used to simulate wet or snowy
surfaces alongside the friction and resistance vectors.
The next problem
Angular velocity dampener
While this current result looks fairly decent and the car feels like it slides okay, it's not perfect. For
instance, the car seems to be in constant sliding every time it turns, plus the rotate ratio around the car's
axis doesn't match well with the turn angle nor what a car should look like turning. This all makes the car look
and feel somewhat like a hovercraft and not a vehicle in contact with the ground. There is some imporvement
to be made on this existing "fake it all" model without necessarily having to simulate anything. Thanks to Casey
Muratori for his insight and feedback after playing this. I wouldn't have revisted it if it weren't for his
feedback. So Said and I went back and spent an evening on it.
One very basic thing to scratch is the angular_v_limit which was already too duct-tape to be viable.
The car had arbitrary limits to the angular velocity, which, while proportionate to the angular velocity,
limited the physics of the whole car, impacting further things like collision resolving. The car wouldn't spin
well.
We need to handle the angular inertia differently:
Here we have two variables that we need to define relative to the game world. The steer_coef is a
scaler that is also proportionate to the car's velocity to limit turn angles at low and high speeds. The
n is a float with a value [0,1] which works against the adding of angular velocity, dampening that
effect. An angular decelerator, if you will. Both of these scalers need to be adjusted to the game world. Which
requires some eyeballing.
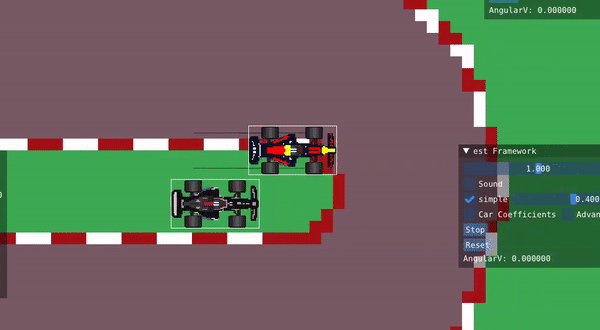
The car is now a bit more realistic and looks less like a hovercraft. This preview looks more polished as these
changes were done in the late stages of development.
The slide accumulator
The second part of making the car feel better at driving is how the car handles sliding. And I mean the
physical and not the visual aspect. We could always render tire marks and smoke whenever, but how the car turns,
slides, and grips is where this model needed improvement. At that point the car just immediately slides as soon
as the the car starts turning, which is by design so far, as we deconstruct the velocity vector as explained
above.
The desired behaviour is that the car would actually be grippy up to a certain point where it would lose that
grip due to excessive cornering forces, akin to how real cars behave. How do we achieve that effect without
necessarily simulating all these different tire forces? Enter the accumulator.
The accumulator is an arbitrary value that increases the harder the car is turning up to a limit and that value
gets multiplied in the scaler that is used to scale down the lateral component of the velocity vector. This
model allowed the freedom to decide the criteria in which the accumulator and scaler would increase and decrease
to tune it such that the car feels good.
The accumulator increases the larger the lateral velocity is and cools down when there is no added velocity,
clamped between two values adjusted through testing. The cooldown is also designed such as in the absence of a
large lateral velocity, the accumulator would cool down faster. Which in practical terms means the car would
recover from a slide quicker if there is no turning.
cooldown is a float coefficient adjusted to the game world. a,b are scaler coefficients
adjusted through testing. the former scales up or down the lateral velocity which affects the cooldown speed. The
latter limits the accumulator to a value that works with the slide coefficent.
Observe the accumulator going up and down as the car turns. Capping at a value where the car has lost grip. The car
otherwise grips relatively well, which is the desired effect.
In the end, the slide_coef is multiplied by the accumulator, car's velocity, brake strength, and
handbrake. Those four variables increase and decrease the sliding to achieve a balanced feel to the car with minimal
physical caluclation.
In the next article I will be talking about track creation and management and how the game handles all of
that.
Thanks for reading, and thanks for playing!